
So, I wrapped all the exposed wire bits in strips of quilt wadding to start with:

Then, loosely based on a teddy bear body pattern I made a calico body that I could stuff:


And stuff it I did - to within an inch of it's life - in an attempt to make the body as firm as possible. It was rather a traumatic experience for poor troll who, as a consequence, suffered a broken finger and a broken shoulder as I was man-handling him. I'm going to have to experiment with baking sculpey at different temperatures and for different lengths of time, I think. Even though it seemed solid enough, it obviously wasn't. But to cheer him up I also made him a tail :)
So I repaired the shoulder with a bit more sculpey and vaseline. And the poor guy had to go back ino the oven. He looked so sad sitting in his baking tray:

Once that was done I finished sewing up the seams at the shoulders and it was time to paint!!
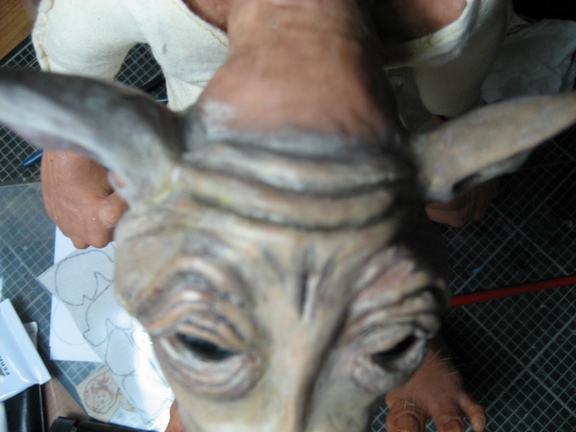
Starting with thin washes of acrylic paint, I mainly used raw umber, burnt umber and Payne's grey but kept changing my mind about how dark or light skinned I wanted him to be so there are quite a few layers on the finished head:


Finally for this post, I added his hair. I'd left the back of his head unpainted so the glue would stick better. For this I followed this tutorial, though I used needle-felting fleece rather than alpaca fur. I had tried to make needle-felted dreadlocks first but they looked a bit rubbish.
I divided the wool into strands and glued then at one end with pva:


I am a little concerned that he's now starting to look a bit like one of these:

This is the last 'work in progress' I'm going to be writing for now. The next stage is to make his clothes and accessories which is something I know how to do, having been making clothes for bears for many years now, and anyway, I want my big 'Ta-Dah!' moment when I can present the finished project :) I'm also a bit distracted by other artwork at the moment so my next post might well be about something completely different...but I will get back to my troll soon, hopefully fully clothed and looking a little less like the ones above.
Looking really good. Interesting that you mention experimenting with baking sculpey at different temperatures, as I've been planning the same myself. I know with transparent it can brown slightly if too hot. Did you have problems putting the stuffed figure in the oven? On some of my figures I've used a brass rod for the head armature and slotted it into a brass rod in the body to allow for removal when working on it which reduces damage from over handling. Looking forward to seeing the finished sculpt, he certainly doesn't look like one of those tacky tourist dolls. Have you ever seen the work of John Bauer a Swedish Arthur Rackham? He does lovely trolls
ReplyDeleteThanks :) I was talking to Kevin Buntin (Boggleboy on DA) about it and he recommended trying a lower temperature for a longer time. He also suggested that cooling the sculpt in the fridge before baking can also help. I guess there's so many variables that you could experiment forever...
DeleteI wish I'd thought of making the pieces seperately - it would've really helped. My local model shop sells lengths of 3 or 4mm brass tubing so I'll definitely be doing that next time.
Love John Bauer - i got his Swedish Fairytales book a few years ago. I think my troll owes quite a lot to his designs, especially round the nose :D